Paper Mache Monsters and Dragons
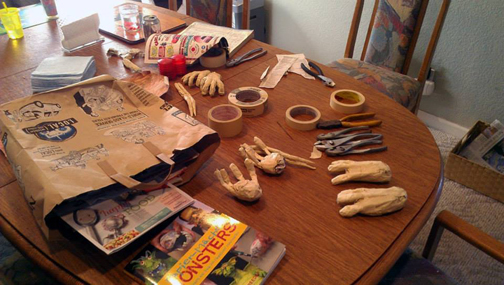
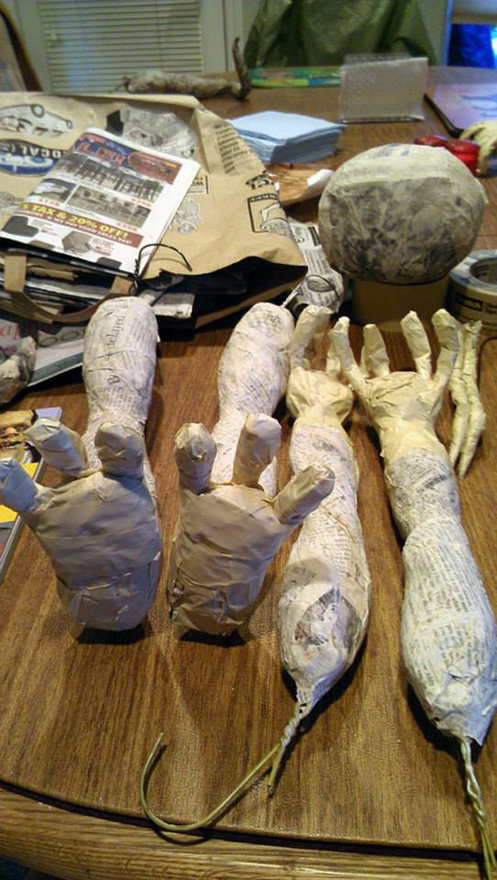
This is just too awesome. This post is about a technique for paper and cloth mache for making amazing creatures. The book (on the desk) by Dan Reeder of GourmetPaperMache.com is an excellent guide, and worth getting a copy or gifting one. This is the beginning of a photo essay where my daughter Lindsay and I make our own monsters. We start by making the hands and feet out of paper, tape, and some old coat hangers.
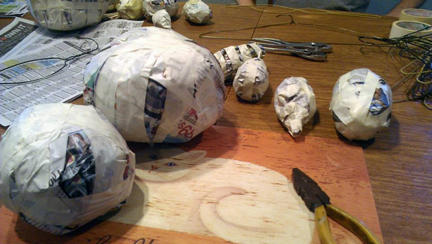
Then we make a lot of random sized balls and spheres out of paper. Just make balls and keep adding until we get the a size we like. No need to put a balloon in the middle. We tape the outsides with masking tape to hold them together.
For the legs and arms, again we start with a coat hanger and wrap them with paper and tape. The book gives complete and detailed instructions, encouraging you that there is no way to fail. The hands and feet are then attached to the legs.

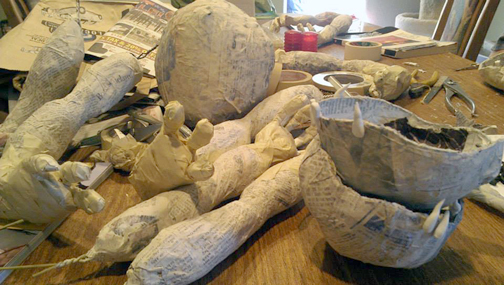
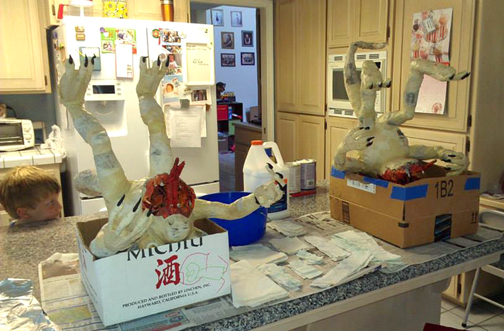
Pretty soon you have a table full of body parts.
Best not to answer the door, or have guests in at this point.
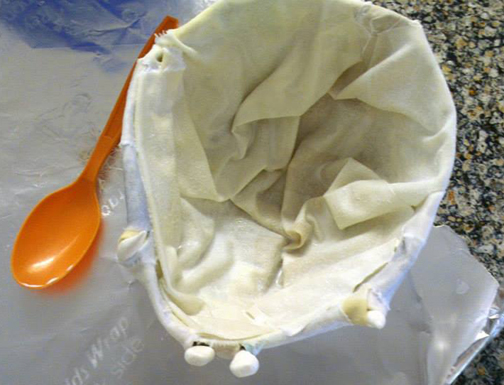
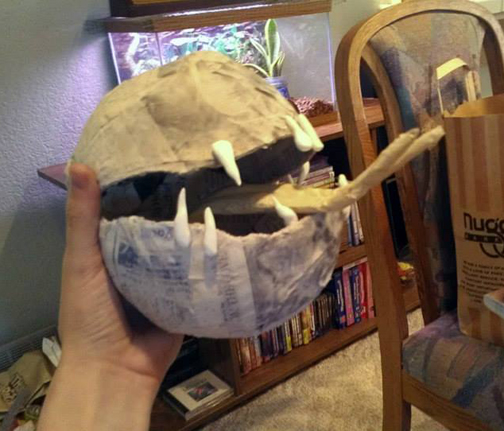
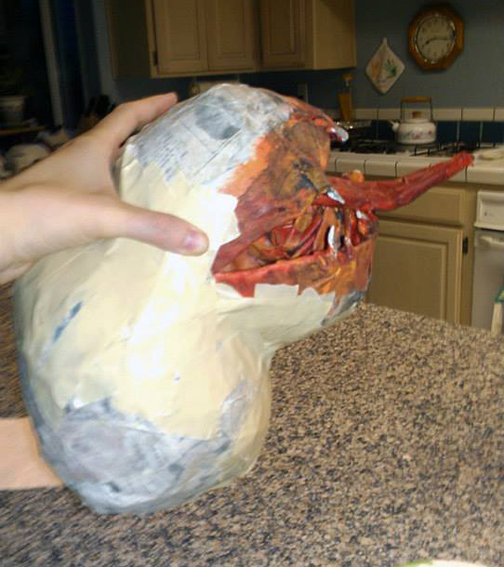
Next it is time to start adding cloth to the inside of the mouth and jaws. This will create lips and gums. It will allow you to attach teeth. We baked up a bunch of teeth and claws using Sculpey Oven Bake Modeling Clay.
The tongue is added. A long forked slithering tongue adds character!
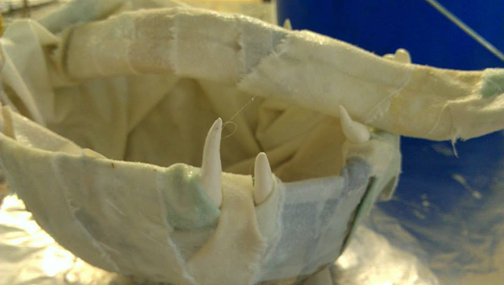
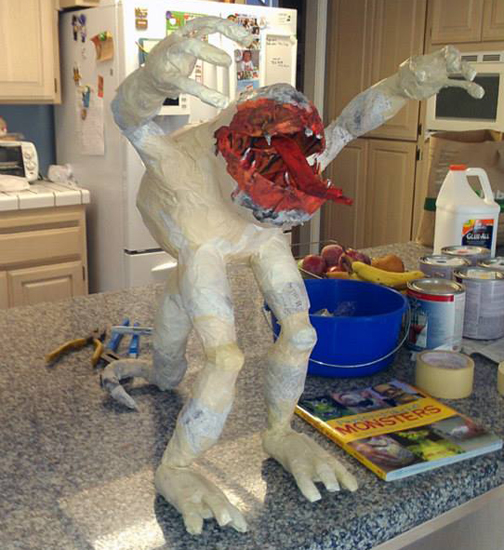
Here you can see the teeth and tongue, with the top and bottom of the jaws. They are not fixed in place yet.
The top and bottom sections can be moved to get the desired expression.
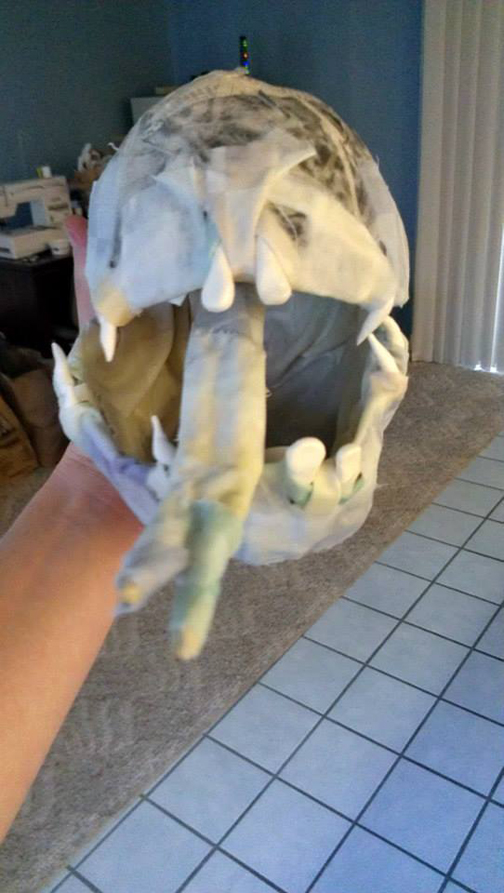
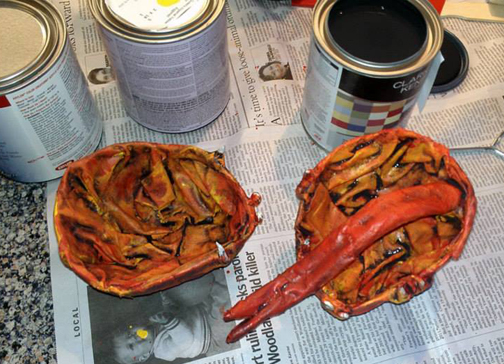
Dan says it is best to paint the insides of the mouth now. It is hard to reach the inside later.
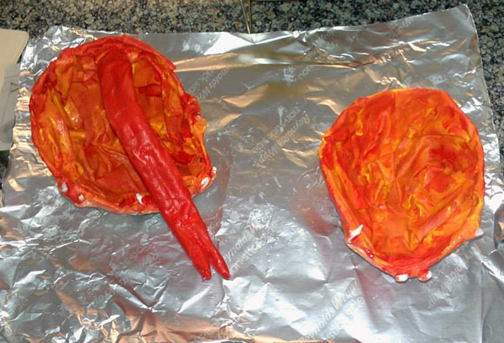
We painted and black-washed the palate and tongue. This technique is explained fully in Dan’s Books. They are interesting reading, but more fun to use.
Once the painting is completed, the head can be assembled.
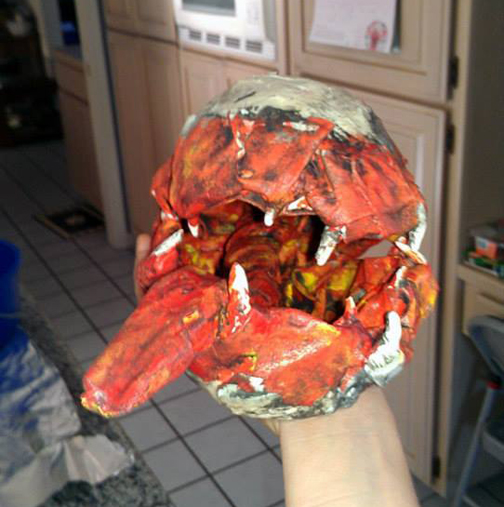
The neck or body can be attached to the head. More detail can be added to the upper head above the upper jaw.
Masking tape will hold the parts together firmly. They will be coated with cloth later for a sturdy structure.

Now we just keep adding body parts. The creature just emerges from the paper, and starts to develop its own character. This leads you in positioning and shaping the pieces.

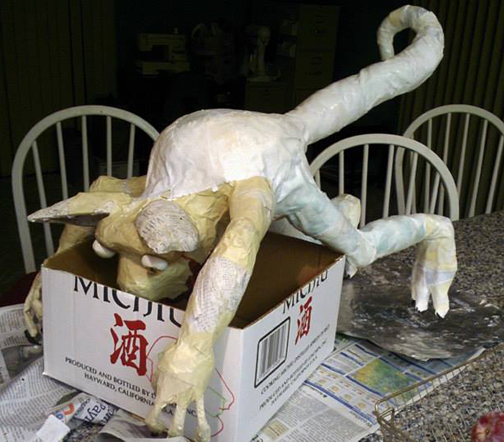
Now we have legs and a tail. The tail helps the biped creature stand up. After all, he does not have a brain yet.
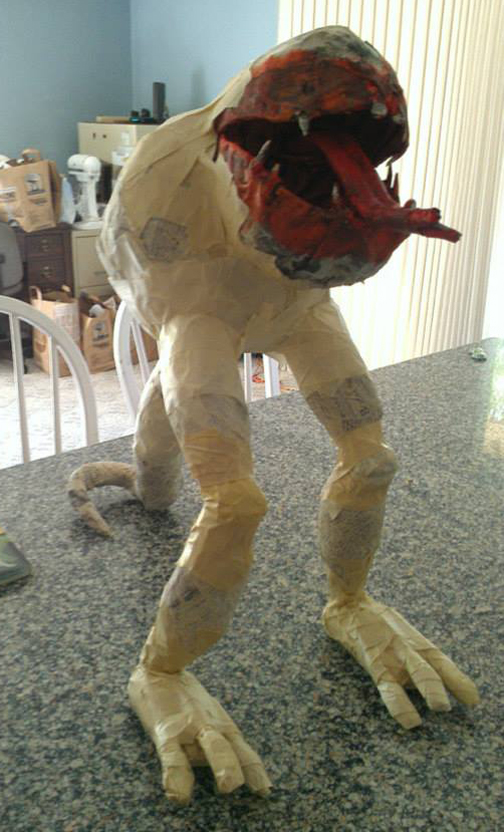
You could make him sitting, crossed legs, or bent at the knees, whatever you like.
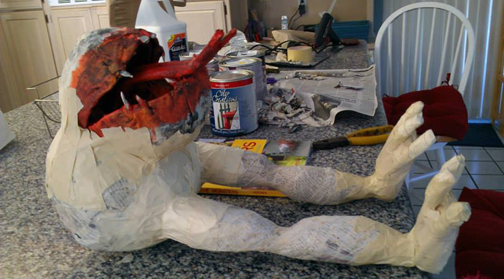
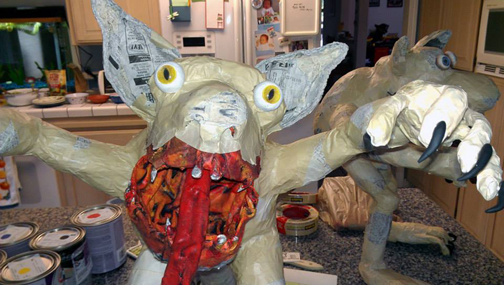
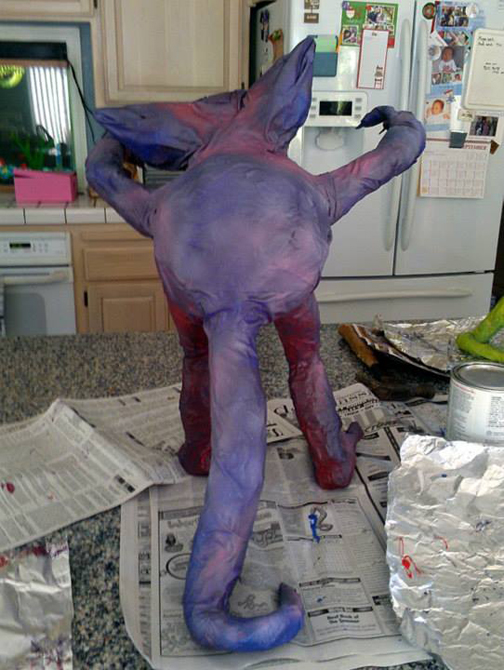
The two monsters are taking shape. Here you can see the side view.
And the back view.
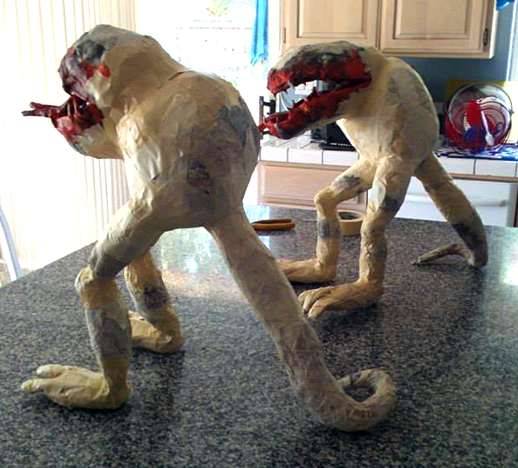
Cute, aren’t they? But they lack individuality.
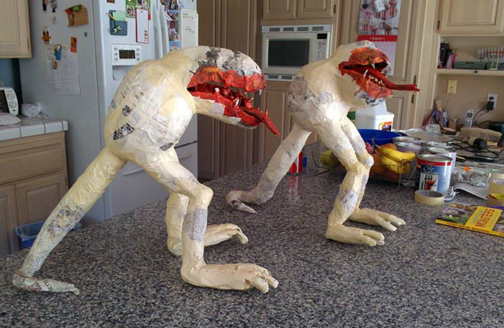
The hands and arms are then attached. Don’t forget to consult the book! Dan also has some amazing videos on YouTube which run at 10x speed to show you the construction in just a few minutes.
We used a shallow box to add the cloth mache to form the skin and scales of each creation.
I created eyes for each monster. I will try to post on how that is done soon.
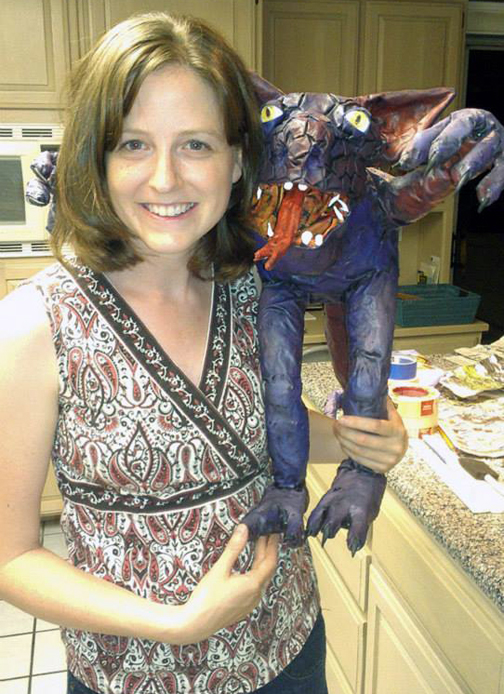
Lindsay is getting friendly with her new pet.

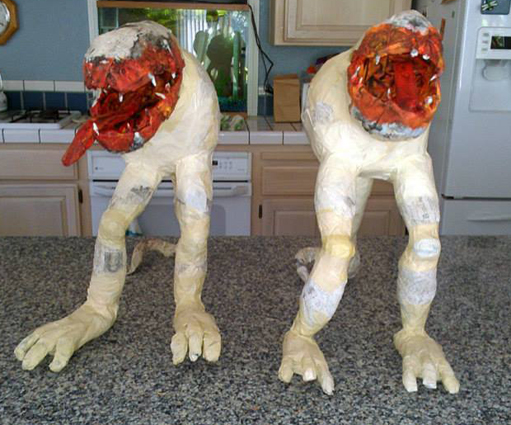
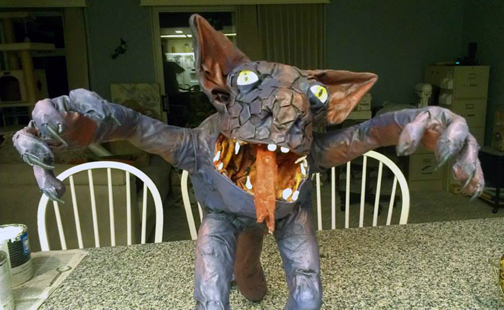
Still, he lacks a face.
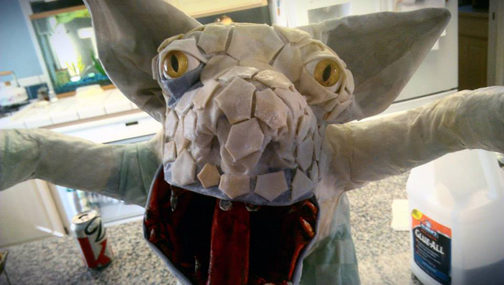
The ears and forehead are attached. Sculpey eyeballs with glass eye fronts are placed.
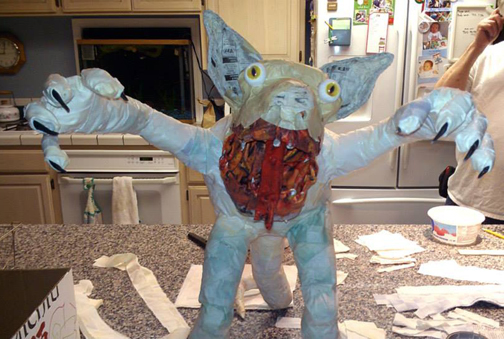
Next we will have too cover the ears and face with cloth skin.
Back to the gluing box.
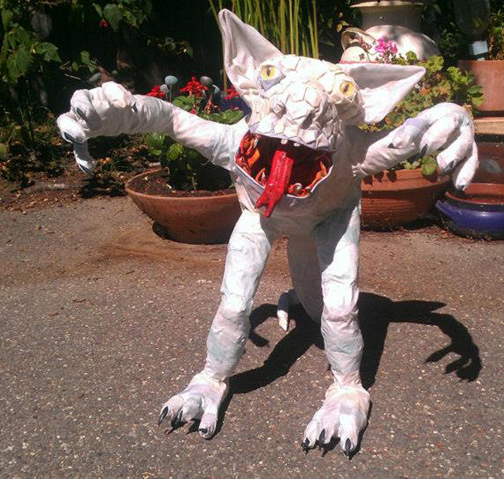
These are the adorable felows with their skins on.
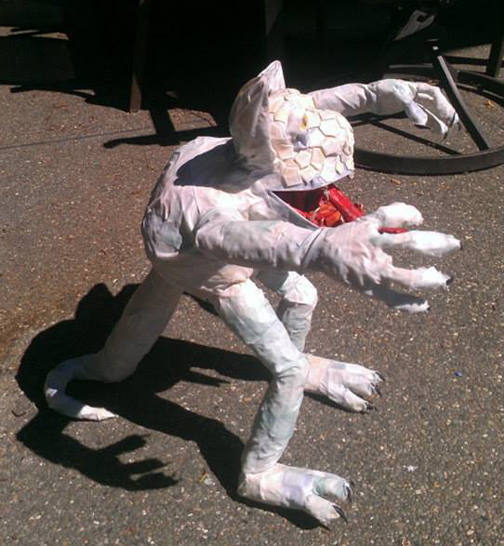
Lindsay decided her pet needed scale plates.
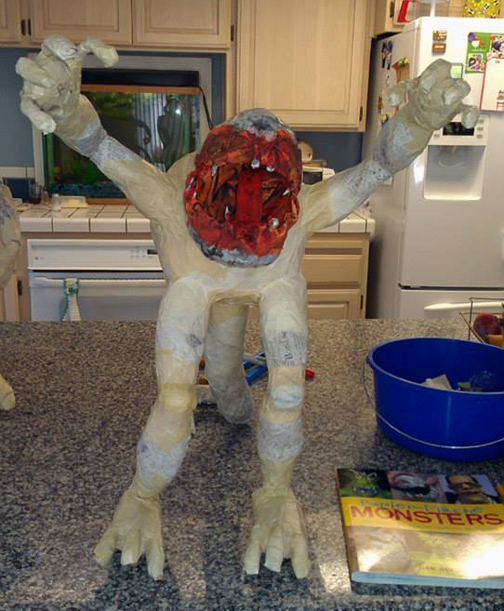
Rather dashing fellow don’t you think?
While they look good, they need color. Any color will do. What old
paint do you have lying around? Here is a tip. People go get paint
mixed for their house, and dont like the color, or the color match does
not work out. They return it to the store. I go to my local Ace
Hardware and buy the mis-matched paint for 1 – 3 dollars a can.
Sometimes gallon size. Then I add small amounts of compatible
colored paint to get the color I want.
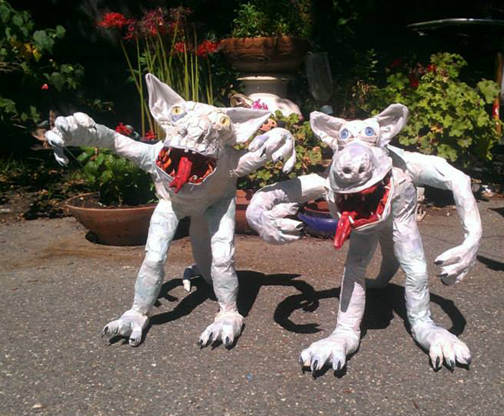
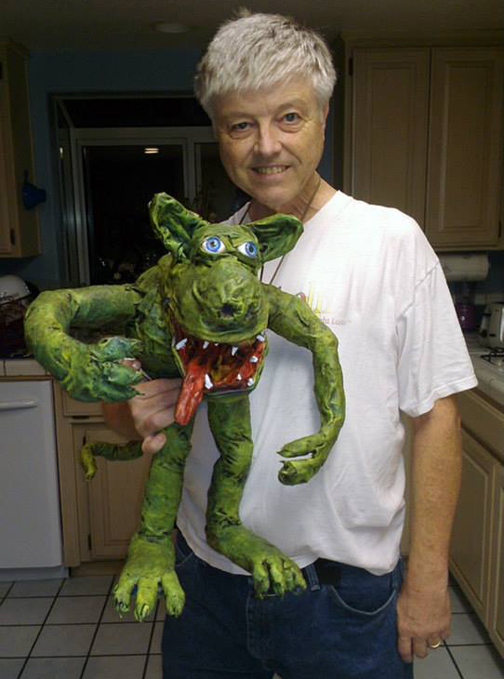
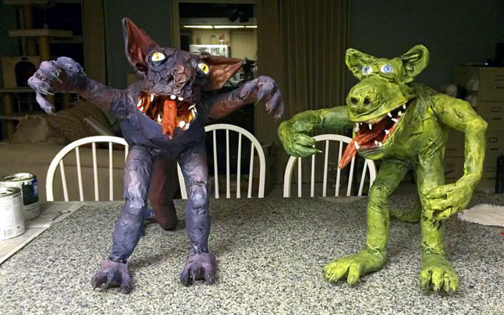
I decided green looked good. The green paint is black-washed to add detail and depth.
And of course, stunning blue eyes.
Lindsay liked the purple/pink look.With piercing yellow snake-like eyes.
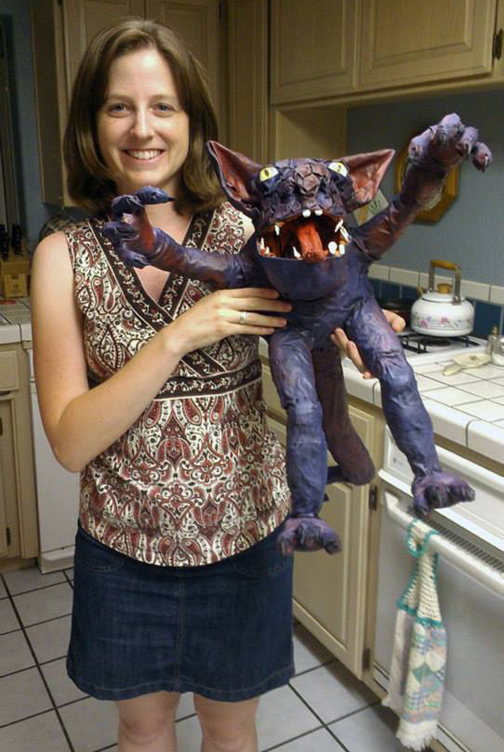

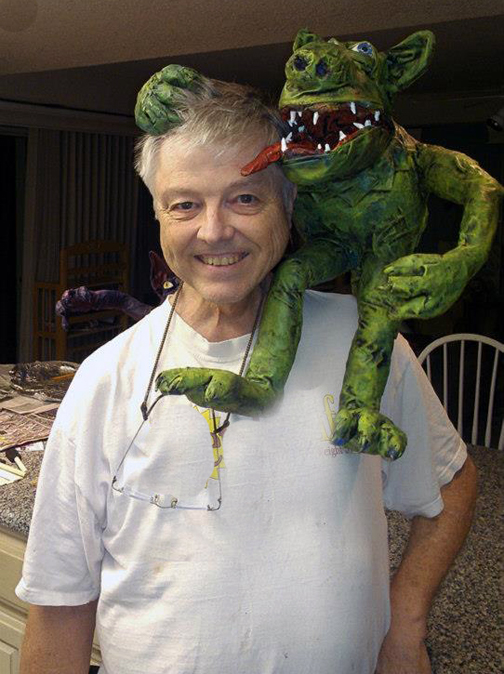
Here are the two finished monsters.
Lindsay will take hers to school for open house. No, she is not the student, she is the teacher!
Thanks for reading. Get Dan’s book. Watch his fast action video. Come back here often to see new ideas.
I will post how to make monster eyes soon.
JerryCraft