Mini Fridge Fermentation Compartment
It is too hot in Davis this time of year. Temps are running in the 90s and even 100s. In my studies, I discovered that many common ales need to ferment in the mid 60s. That could be a problem! The coolest place in the house in in the high 70s! Well, this is a college town. Where there is a university, there are student dorms. Where there are dorms, there must be… MINI FRIDGES!!
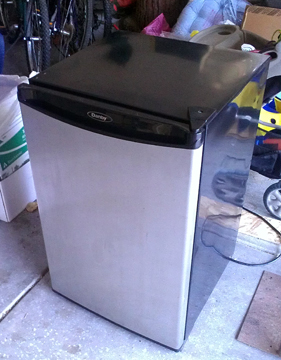
Mini Fridge Temperature Stable Fermentation Compartment
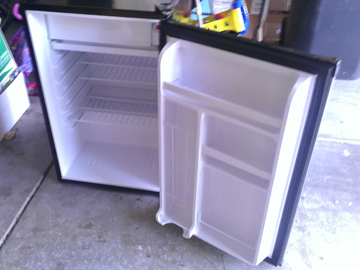
I checked out the local Craig’s List, and found this dandy for about $30. A student leaving town doesn’t want to move it. There was some internal door structure, some shelves and, “Oh no!”, a small freezer compartment.
I tested a 5 gallon better bottle. It fit in fine. The 6 gallon better bottle needed 1/2 inch beyond the door frame.
I did some reading about kegerator conversions, thermostats, remote temperature sensors, etc, etc. This $30 deal could turn into a priceless item very quickly! Well no time to worry about that now. I could not resist the need to tinker. It is always easier to take things apart, right? First I removed the top hinge (2 screws) and the door was off!
Well, the door seal took a bit of time, but 24 screws later, and voila!
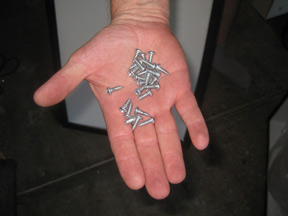
The door seal has a magnetic latch all around the doorcase.
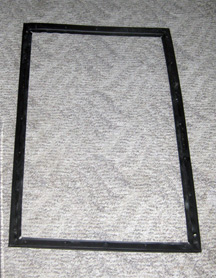
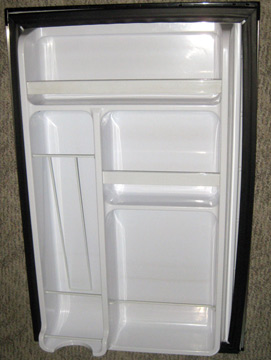
The can and bottle holders molded into inside of the door came off with the seal, no glue inside. It left the door itself. It had a 1/2 inch well in the door which covered MOST of the door. One side did not have this indentation.
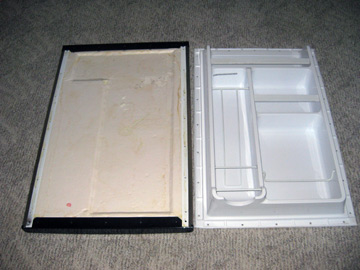
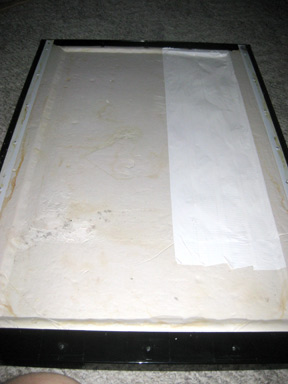
I decided to make the door panel flat, in case I wanted to use that extra 1/2 inch some time. The door foam insulation was covered in a paper liner, probably moisture resistant.
I cut through the paper liner and into the foam to the depth of the surrounding deck. The raised area is marked with a red letter “D”.
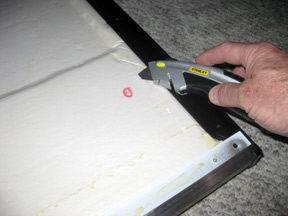
I covered the denuded foam with white Duck tape. Now there was a nice recess in the door which could be used for more space. (Thinking ahead to kegs?)
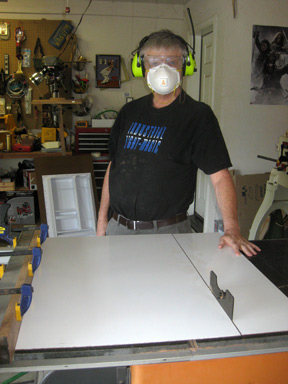
I used the table saw to cut a piece of whiteboard (purchased at BORG for $10) to the exact size of the moulded door panel I had removed (in background). This picture is also to remind everyone to always wear proper safety equipment while using power tools.
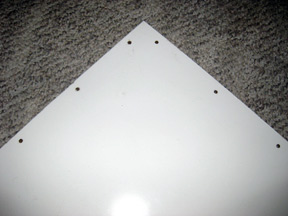
I drilled 24 new holes in the exact positions using the old door panel as a guide.
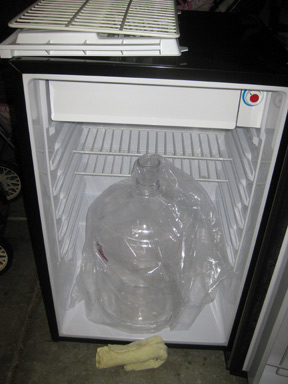
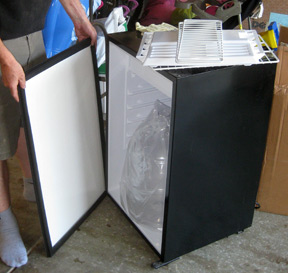
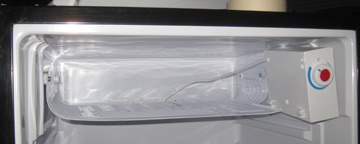
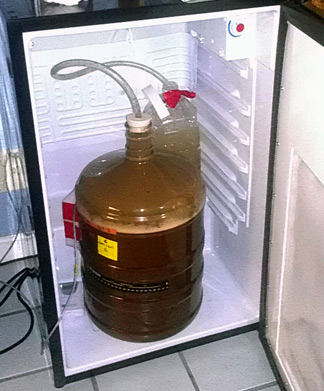
I put everything back together, and the 5 and six gallon Better Bottles fit in without using the extra space created earlier. I am glad i did it so I will have that space in reserve. This shows the six gallon bottle in the fridge.
I test-fitted the fermentation lock. It sticks up too high. It hits the little mini freezer compartment. Out with it I say!
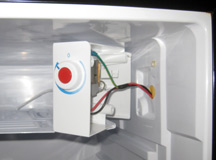
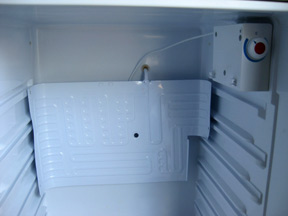
The freezer floor is also the only cooling element for the mini fridge. It has the temperature probe attached to its underside. You can see the probe line running from the thermostat to the cooling tray. The tray itself is held in place by 4 screws, and a slot in the thermostat housing. I took the 4 screws out and removed the thermostat.
Unplug Fridge before attempting this. Live 110 Volts!
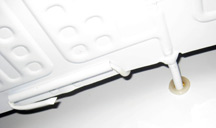
The coolant tube enters the back wall of the fridge and runs for about 4 cm and into the tray. You can see the coolant pipe here. Notice the temperature probe on the underside (to the left) as well.
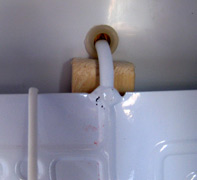
I made a tube bending tool out of a piece of pine furring strip and gently folded the freezer/cooling tray down flush with the back of the cabinet.

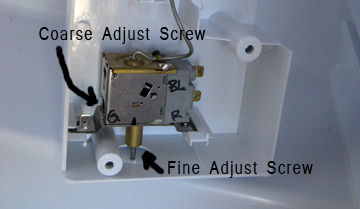
This is the thermostat with the power and ground electrical lines removed. Remember, these are hot 110V lines, be sure fridge is unplugged if you work in this area, or even remove it for a project like this. The fine adjust screw is where the knob attaches. On this thermostat, the coarse adjust screw was found by the ground terminal, marked “G”.
There was some talk on Google site about using this to raise the temperature for a freezer or fridge. I am putting this image in for illustration only.
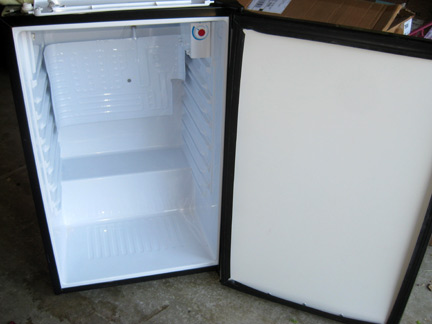
Now this is just a refrigerator with no freezer compartment. The tray is bent downward and sits about 1.5 cm from the back wall.
I replaced the thermostat and housing. I did not modify the coarse temperature setting. Both fermenters (5 and 6 G) now sit easily in front of the compressor hump (the ledge in the bottom back of the cabinet.)
The Cabinet now has room to put fermentation locks on the Better Bottles with room to spare.
The Minifridge is a Darby DCR 412 BLS. Not the most ideal model, but for $30, it is a great find for the hot weather blues!
JerryCraft

4 thoughts on “Mini Fridge Fermentation Compartment”
Peter OPosted on 5:36 pm - May 18, 2016
You replaced the thermostat with what?
Please advise the diameter of your fermentation bottle.
Thanks
JerryCraftPosted on 5:53 pm - May 18, 2016
Hi,
Thanks for your interest.
I did not replace the thermostat. I just leave it on full cold. I use an STC 1000 to cut off the compressor at the proper temperature, and restart it if the wort temp begins to rise. The STC 1000 can be programmed with lock out intervals to protect the compressor and the desired target temperature range. I have also used the Johnson A-419 temperature control. It works equally well, but costs about 4x as much.
The mini firdge conversion as shown fits easily a 5 gal better bottle, and a 6 gallon better bottle. I do not brew in glass. It is heavy and could break causing injury. See pictures of both on my BIAB post (at the bottom of the post.) Brew In A Bag
McBrewPosted on 9:04 am - May 31, 2017
Hi Jerry, could you perhaps link to the Google site you mentioned for heating?
JerryCraftPosted on 4:17 am - Jun 1, 2017
You could read through the forum post below. There are 59 entries.
Brewtalk link
A mini fridge thermostat may very more widely than you desire for fermentation. I use the STC 1000 temp controller where I can set the upper and lower limits, and the compressor time out interval. Just leave the fridge cooling set to on, and let the STC turn it on and off at the correct temps.
Cheers,
Jerry